
The secret to a successful taste test isn’t just making it a game; it’s transforming your kitchen into a fun, low-pressure sensory lab.
- Focus on exploration over consumption by using pea-sized “research samples” to eliminate fear and waste.
- Empower kids with a “Flavor Detective” role, giving them the tools and vocabulary to describe new foods without pressure.
Recommendation: Start by teaching the five basic tastes (sweet, sour, salty, bitter, umami) using our “Flavor Detective Kit” idea to build a solid foundation of sensory awareness and vocabulary.
Is the dinner table a battleground? If the sight of a new vegetable sends your child into a spiral of suspicion, you’re not alone. Many parents are told to “make food fun” or “just have them try one bite,” but these tactics often backfire, increasing pressure and resistance. This approach can turn mealtime into a power struggle, where the food itself becomes the enemy and your goal of fostering healthy, adventurous eating feels further away than ever.
But what if the goal wasn’t consumption, but curiosity? What if, instead of focusing on getting them to swallow, we focused on getting them to explore? The true key to unlocking a child’s palate is to shift the entire framework. We need to move from a high-stakes meal to a low-pressure experiment. By turning your kitchen into a “sensory lab” and recasting your kids as official “Flavor Detectives,” you can transform their fear of the unknown into a genuine desire to discover.
This guide provides a comprehensive framework to do just that. We’ll walk you through how to set up a taste test that feels like a thrilling scientific mission rather than a chore. You’ll learn how to teach the fundamental building blocks of flavor, make “scary” foods approachable, run activities safely, and even capture the notoriously short attention span of a teenager. Get ready to trade dinner-table drama for a fun-filled family activity that builds confidence, one tiny taste at a time.
In this article, you will discover a structured approach to making food exploration a beloved family activity. The following sections break down every step of the process, providing practical strategies and expert insights to ensure your taste test challenge is a resounding success.
Summary: A Guide to Creating Fun Food Adventures at Home
- Sweet, Sour, Salty, Bitter, Umami: How to Teach Them?
- How to Make “Scary” Fruits Fun Through Presentation?
- Blindfold Tasting: Is It Safe and Fun for Kids?
- The Waste Mistake: Portions for Tasting vs Eating
- Dip Strategy: Using Sauces to Introduce New Vegetables
- How to Use “Food Chaining” to Move from Nuggets to Chicken Breast?
- How to Celebrate Global Festivals Authentically Without Appropriation?
- How to Keep Teenagers at the Dinner Table for More Than 10 Minutes?
Sweet, Sour, Salty, Bitter, Umami: How to Teach Them?
Before a child can say they “like” or “dislike” something, they need the words to describe what they are experiencing. Teaching the five basic tastes is the foundation of building a sensory vocabulary. This isn’t just about naming flavors; it’s about giving your child the tools to analyze and understand food. It’s especially important because research shows that children possess up to twice as many taste receptors as adults, meaning they experience flavors like bitterness with far greater intensity. Understanding this helps build empathy for their reactions.
The key is to isolate each taste in a clear, fun way. Don’t just point to a lemon and say “sour.” Turn it into an investigation! This approach is at the heart of established educational methods that have proven to be highly effective in building sensory awareness in young children.
Case Study: The Montessori Tasting Bottles Method
For decades, Montessori classrooms have used a simple yet brilliant activity to develop the gustatory sense. Children are given two identical sets of dropper bottles, each containing a basic taste solution (e.g., salty water, sweet water). Their task is to taste from the bottles and match the pairs based on flavor alone. This method successfully helps children aged 3-6 build not only their taste discrimination skills but also their concentration and sensory vocabulary, all within a playful, self-directed framework.
You can bring this “sensory lab” concept home by creating a “Flavor Detective Kit.” Prepare small, labeled dropper bottles with mystery liquids: sugar water for sweet, diluted lemon juice for sour, salt water for salty, cooled unsweetened tea for bitter, and mushroom broth for umami. Have your little detective taste each one and try to describe it. Then, turn it into a scavenger hunt: “You found the salty vial! Can you find another salty food in the pantry?” This game transforms abstract concepts into a tangible, memorable experience.
How to Make “Scary” Fruits Fun Through Presentation?
For a child, an unfamiliar fruit like a spiky rambutan or a vibrant dragon fruit can be intimidating. This fear of new foods, known as food neophobia, is a normal developmental stage. The mistake many parents make is pushing for a bite too soon. Success isn’t about consumption; it’s about positive interaction. The goal is to make the food familiar and interesting long before it ever touches their lips.
To do this, use a technique called “Sensory Stair-Stepping.” Instead of presenting a slice and expecting them to eat it, you break down the interaction into tiny, low-pressure steps. Each step is a victory in itself. This method respects the child’s caution while gently encouraging curiosity, reframing success as exploration. It’s about building comfort and knowledge through sight, touch, and smell first.
This approach invites a child to become a scientist, examining a new specimen. The vibrant colors and strange textures of exotic fruits are perfect for this kind of exploration. Look at how the child in the image below is interacting with the fruit: it’s all about tactile discovery and wonder, not eating.
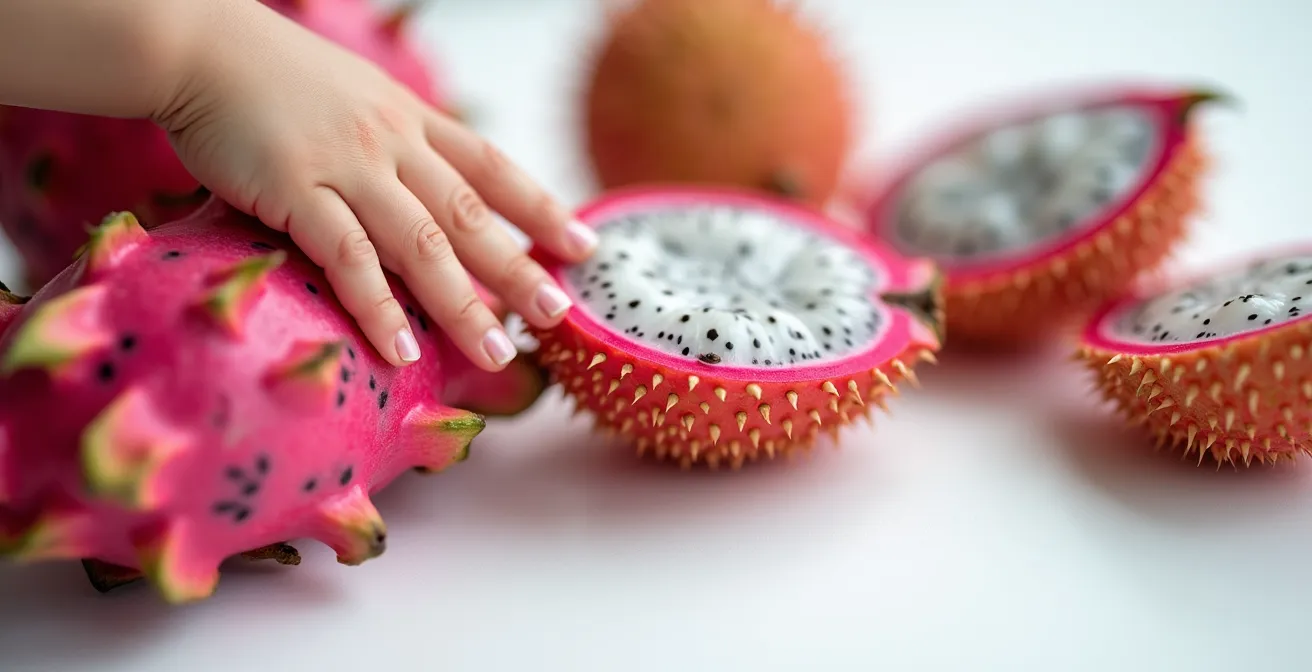
As the image demonstrates, the first interaction can be purely visual and tactile. Here’s how you can apply the Sensory Stair-Stepping method at home:
- Look, Don’t Touch: Start by simply placing the whole fruit on a plate for visual exploration. Talk about its colors and shape.
- Touch and Feel: Offer a piece of the peel or the whole fruit to be held. Ask, “Is it smooth, bumpy, or spiky?”
- The Smell Test: Provide a slice for smelling. “What does it remind you of?”
- The Tiniest Taste: Suggest just licking the fruit or taking a “mouse bite.” Any taste exposure, no matter how small, is a win.
- Celebrate Exploration: Cheer for the completion of ANY step! By celebrating the act of smelling or touching, you remove the pressure to eat and make the entire experience a fun discovery.
Blindfold Tasting: Is It Safe and Fun for Kids?
The blindfold taste test is a classic party game, but is it a good tool for picky eaters? The answer is yes—if you do it right. When the visual element is removed, a child can’t pre-judge a food based on its color or shape. This encourages them to focus purely on texture and flavor, often leading to surprising discoveries. However, this activity comes with a big responsibility: safety is non-negotiable. A poorly managed blindfold game can be scary and even dangerous.
The key is to reframe the activity. Instead of a high-pressure “Guessing Game,” call it a “Description Game.” The goal isn’t to correctly identify the food, but to describe it. Ask questions like, “Is it crunchy or soft?” or “Is it sweet or salty?” This removes the fear of being wrong and equips them with sensory vocabulary. It’s also crucial to offer alternatives to a full blindfold, like simply closing their eyes or using a paper towel roll as “blinders,” to ensure the child feels in control.
Case Study: Safe Tasting Success with a Youth Group
A youth group hosted a taste test for 25 teens and tweens, an age group prone to both peer pressure and anxiety. By implementing strict safety rules, the event was a huge success. According to a report on the activity, all foods were pre-cut to safe, bite-sized portions, and participants remained seated. Most importantly, a clear “tap out” signal was established, and adult helpers were present at each table. The result? Zero incidents and participants reporting increased confidence in trying new things when the visual bias was removed.
To ensure your blindfold test is both fun and completely safe, a clear protocol is essential. The following checklist provides the five unbreakable rules for any taste test where vision is obscured. This isn’t just advice; it’s a safety requirement.
Your Safety-First Blindfold Tasting Protocol
- Establish a Clear “Tap Out” Signal: Before starting, agree on a non-verbal signal (like two taps on the table or a thumbs-down) that means “stop immediately, no questions asked.”
- Offer Blindfold Alternatives: Never force a blindfold. Offer options like turning their chair around, using toilet paper roll “blinders,” or simply closing their eyes. Control is key.
- Cut All Foods to Pea-Sized Portions: This is the most critical rule. To prevent choking, no food item should be larger than a corn kernel.
- Frame as a “Description Game,” Not a “Guessing Game”: Shift the focus from identification to description. Ask, “Is it crunchy or smooth?” to build vocabulary and reduce pressure.
- Ensure Constant Adult Supervision: An adult must be present at all times, and walking paths should be clear if anyone needs to move while their vision is obscured.
The Waste Mistake: Portions for Tasting vs Eating
One of the biggest anxieties for parents hosting a taste test is the fear of food waste. What if you prepare a beautiful platter of new foods and your child rejects all of it? This concern is valid, but it stems from a common mistake: confusing a “tasting portion” with a “meal portion.” A taste test is not dinner; it’s a data-gathering mission. And for this mission, the samples should be tiny.
The goal is to lower the barrier to entry so dramatically that trying something new feels effortless. A full spear of broccoli is intimidating; a single floret the size of a pea is a curiosity. In fact, food education experts recommend that “tasting portions” be no larger than a single pea to dramatically lower a child’s resistance. This tiny size communicates that the commitment is minimal and there’s no pressure to finish anything.
Adopting this “research sample” mindset also opens up creative ways to deal with leftovers, completely eliminating waste. Think of uneaten samples not as rejections, but as valuable data for your next experiment. Frame it for your kids: leftover apple slices that scored low for “crunchiness” can be transformed into applesauce for a “smoothness” experiment tomorrow! Using an ice cube tray or a mini muffin tin is a brilliant way to pre-portion these micro-samples and reinforce the “science lab” feel of the activity. What’s left can become an ingredient for a “Taste Test Champion Soup” or a smoothie, celebrating all the foods that participated in the adventure.
Dip Strategy: Using Sauces to Introduce New Vegetables
Dips are a parent’s secret weapon in the battle against vegetable reluctance. A familiar, beloved sauce acts as a “flavor bridge,” making an unfamiliar or “scary” vegetable seem much more approachable. It’s a simple psychological trick: the dip provides a comforting, predictable taste that gives a child the courage to try the unknown item it’s paired with. A raw Brussels sprout is a huge challenge; a raw Brussels sprout dipped in ranch dressing is an intriguing possibility.
However, not all dips are created equal. The key is to use them strategically. You can “gamify” the experience by assigning different dips as “power-ups” depending on the difficulty of the vegetable. This turns the tasting process into a fun challenge with clear rewards. A very challenging vegetable might earn the right to be paired with a super-favorite dip like ketchup, while an easier one might be paired with a healthier but still tasty option like hummus or a yogurt-herb sauce.
This strategy gives the child a sense of agency and fun. You can even create “Courage Boost Points” for different combinations, turning the whole experience into a game they want to win. The following guide breaks down how to match the right dip to the right challenge level.
| Vegetable Challenge Level | Recommended Dip ‘Power-Up’ | Courage Boost Points |
|---|---|---|
| Very Scary (e.g., Brussels sprouts, kale, raw mushrooms) | Ranch or Ketchup (familiar favorites) | +5 Courage |
| Medium Challenge (e.g., Broccoli, cauliflower, bell peppers) | Hummus or Cheese sauce | +3 Courage |
| Low Challenge (e.g., Carrots, cucumbers, celery) | Yogurt-herb or Light vinaigrette | +1 Courage |
As this strategic pairing analysis shows, you can adjust the “power-up” to match the bravery required. This simple framework empowers both you and your child, providing a clear path forward for introducing even the most challenging vegetables in a playful and effective way.
How to Use ‘Food Chaining’ to Move from Nuggets to Chicken Breast?
For some children, the issue isn’t just flavor—it’s texture. A child who loves crunchy chicken nuggets might refuse a piece of grilled chicken breast not because of the taste, but because the texture is completely different. This is where a powerful technique called “food chaining” comes in. Food chaining is the process of linking a well-loved food to a new food through a series of small, incremental changes in taste, temperature, or texture.
The classic example is transitioning from a highly processed chicken nugget to a plain piece of grilled chicken. You don’t make the jump in one step. Instead, you create a “progression game” with several rounds. You might start by comparing two different brands of their favorite nugget. The next round could pit their favorite nugget against a panko-breaded chicken tender. Then, the panko tender against a lightly breaded grilled strip, and finally, the grilled strip against a plain piece of chicken. The key is that only one variable changes slightly at each step, making the transition manageable. Throughout the game, a favorite dip can serve as the “constant” comfort factor, providing familiarity during the change.
Empowering the child with language is also a critical part of this process. Instead of a simple “like” or “dislike,” you can help them articulate exactly what it is about the texture they are reacting to. This turns them from a passive reactor into an active food critic.
Case Study: The “Crunch-o-Meter” Success
One parent, struggling with a child who would only eat very specific textures, found success with food chaining by focusing on description. As detailed in a popular guide on taste-testing games, they created a “Crunch-o-Meter” scorecard. The child rated foods on a scale of 1-5 for crunchiness, softness, and juiciness. This simple tool gave the child the vocabulary to explain *why* they didn’t like something (e.g., “It’s not crunchy enough”). This shift in focus from judgment to analysis gave the child a sense of control and made them more willing to try the small changes inherent in food chaining.
How to Celebrate Global Festivals Authentically Without Appropriation?
A taste test is a fantastic window into other cultures. Exploring the foods of a global festival like Diwali, Lunar New Year, or Día de los Muertos can be an enriching and delicious educational experience. However, it’s essential to approach it with respect and mindfulness to ensure you are practicing cultural appreciation, not appropriation. The goal is to learn from and honor a culture, not to reduce it to a costume or a theme party.
The first rule is to frame the activity correctly from the start. Tell your family, “Tonight, we are honored guests learning about this beautiful celebration.” This sets a tone of respect and curiosity. The focus should be on authenticity and education. Instead of buying a generic “international” snack box, take the time to research traditional festival foods and try cooking an authentic recipe together. This act of preparation is a powerful part of the learning process.
The experience should be multi-sensory and context-rich. While you taste the food, play traditional music from the culture. Locate the country or region on a world map. Most importantly, connect the food to the festival’s meaning. Read age-appropriate stories about the celebration’s history and discuss why certain foods are eaten at that time. For example, explain why sweet foods are central to Diwali or why mooncakes are essential to the Mid-Autumn Festival. This turns a simple tasting into a deep, meaningful lesson in global citizenship and empathy, which has the added benefit of making children more open to trying the new foods presented.
Key Takeaways
- Reframe the Goal to Exploration: Success is not consumption, but any positive interaction with a new food—touching, smelling, or licking all count as wins.
- Use “Research Sample” Portions: Serve tiny, pea-sized portions to dramatically lower pressure, reduce intimidation, and eliminate food waste.
- Empower with Roles and Vocabulary: Turn kids into “Flavor Detectives” or “Food Critics” with tools like scorecards to help them describe what they taste beyond just “like” or “dislike.”
How to Keep Teenagers at the Dinner Table for More Than 10 Minutes?
Engaging a teenager in a family activity can feel like an impossible mission. Their desire for independence and a packed social schedule often means family dinner is a brief, transactional event. The secret to getting them to participate—and even enjoy—a taste test is to flip the script entirely. Don’t ask them to be a participant; ask them to be the expert host.
Teens crave autonomy and respect. By putting them in charge, you tap into this fundamental need. Let them choose the theme for the taste test. Instead of tasting carrots, they can organize a “gourmet” challenge. Think testing different brands of craft sodas, artisanal potato chips, or even a range of hot sauces with official Scoville ratings. They can design the scorecards, research the products, and present the “flights” to the rest of the family. This shift from passive taster to active organizer gives them ownership and a reason to be invested.
You can also appeal to their intellectual and competitive side with a “Deceptive Foods Challenge.” Have them test different brands of a popular snack and guess the sugar content or the number of artificial ingredients before the grand reveal. This leverages their natural skepticism and turns the activity into a savvy, media-literate investigation rather than a “kid’s game.”
The Teen Expert Flip Strategy
A library program for tweens and teens (grades 5-8) struggled with engagement until they implemented this “expert flip.” Instead of being participants, the older kids were tasked with designing and hosting taste test challenges for younger children. They loved the responsibility. The teens researched products, created scoring systems, and acted as official event hosts. The program saw a massive spike in engagement, with teens staying for the full hour-long sessions and asking to repeat the “expert” role. This demonstrates that giving teens leadership is the most effective way to secure their buy-in.
Start your family’s food adventure today by setting up your first “Flavor Detective” challenge. Begin with the five basic tastes and watch as structured, playful curiosity replaces conflict at your dinner table.